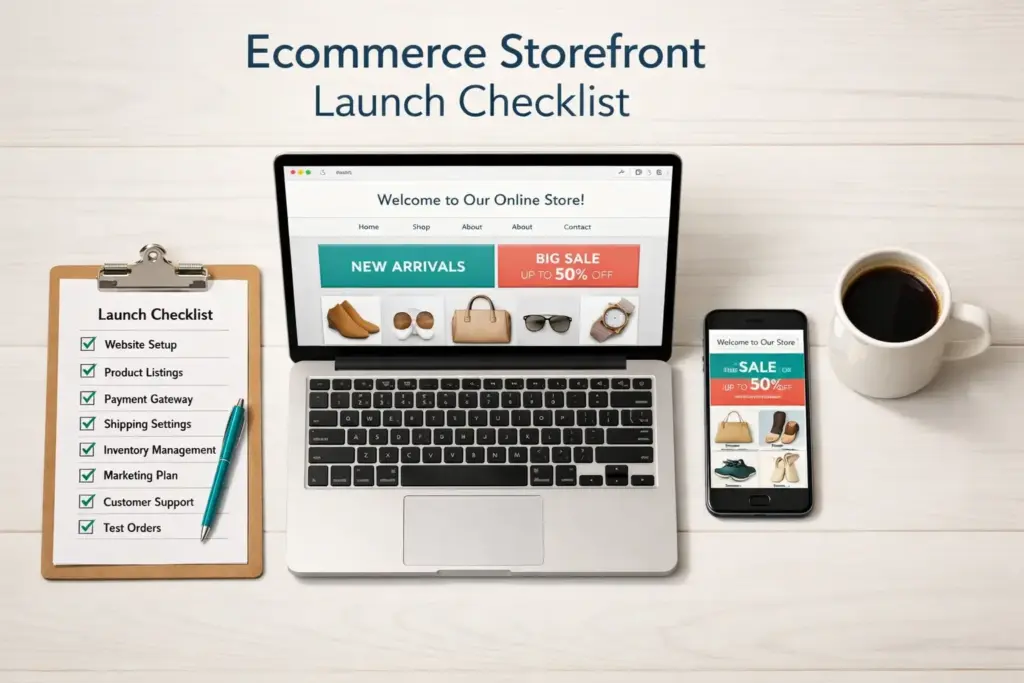
- An ecommerce storefront launch checklist prevents the costly mistakes that sink new stores: broken checkout flows, missing legal pages, unconfigured tax settings, and zero analytics tracking on day one.
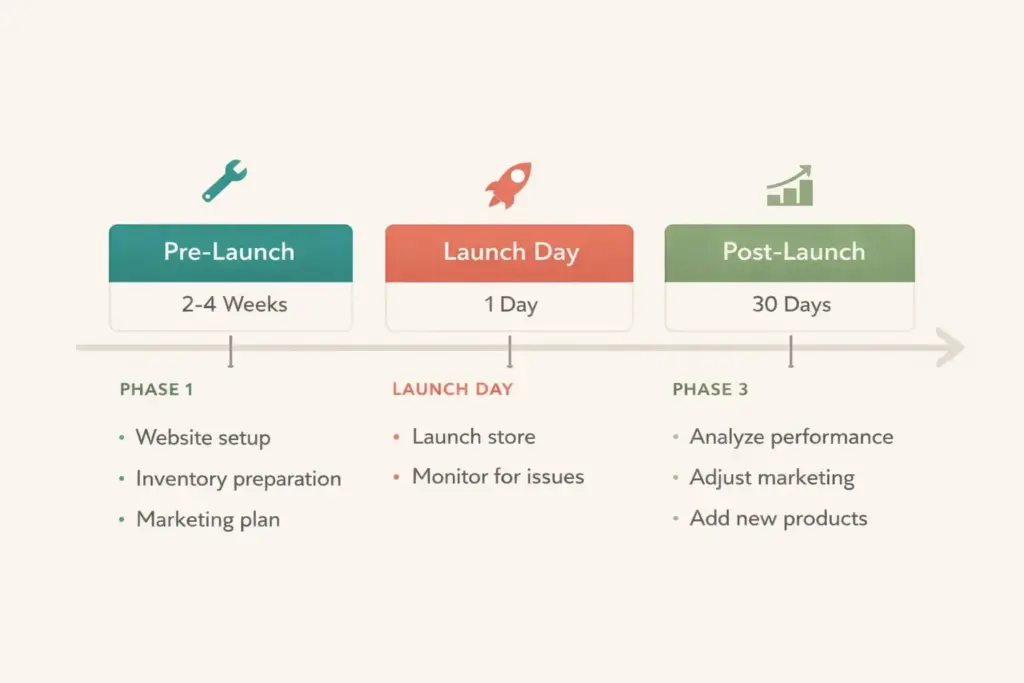
- The checklist splits into three phases: pre-launch (legal, product, design, and tech setup), launch day (final testing and going live), and post-launch (first 30 days of optimization).
- Test your checkout end-to-end with at least 3-5 real test transactions covering different payment methods before removing your password page. A 1-second delay in page load time can reduce conversions by 7% according to BigCommerce research.
- This checklist is platform-agnostic. It works whether you're building on Shopify, WooCommerce, BigCommerce, or any ecommerce platform.
An ecommerce storefront is an online store where customers browse products, add items to a cart, and complete purchases through a digital checkout process, powered by an ecommerce platform like Shopify, WooCommerce, or BigCommerce that handles everything from product display to payment processing and order management. Getting it right before launch is the difference between a store that converts from day one and one that leaks sales through broken checkout flows and missing trust signals.
Most new store owners rush to go live the moment their homepage looks decent. Then they spend the first week fielding customer complaints about payment errors, wrong shipping rates, and missing order confirmation emails. A launch checklist prevents that chaos by forcing you to test, verify, and fix problems while the only person shopping your store is you.
This checklist works for any platform. Whether you’re starting an ecommerce business on Shopify, WooCommerce, BigCommerce, or a custom build, these 30 steps apply universally. I’ve organized them into three phases: pre-launch setup, launch day testing, and post-launch optimization for your first 30 days.
Phase 1: Pre-Launch Setup (2-4 Weeks Before Launch)
This is the foundation-building phase. Every item here should be complete before you even think about removing your password page or telling anyone your store exists.
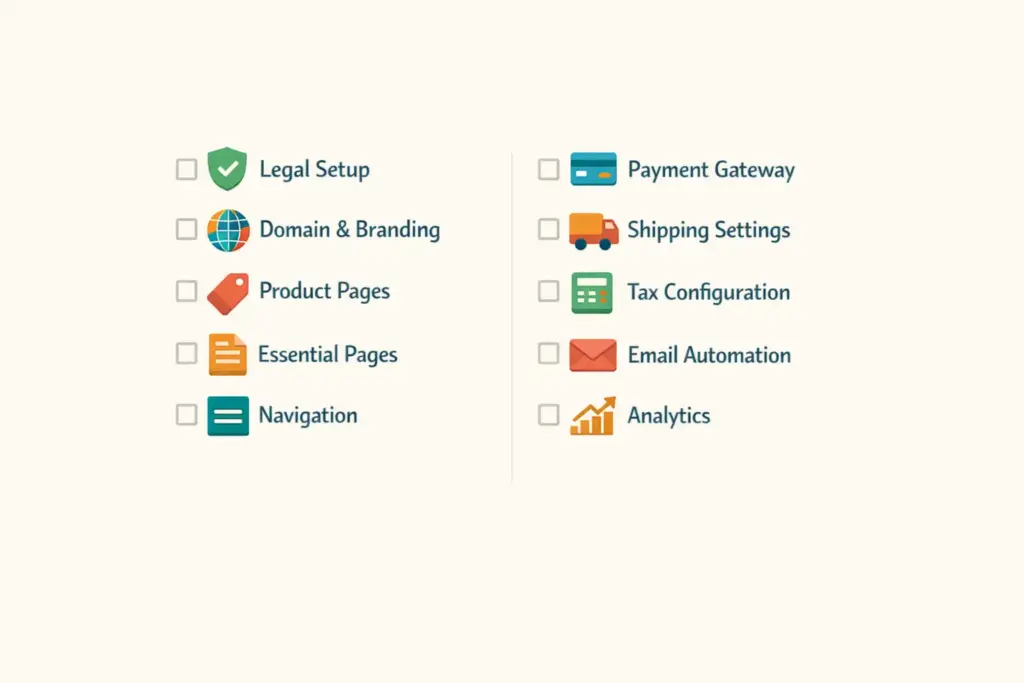
1. Legal and Business Setup
Your legal structure needs to be in place before your first sale, not after. Complete these items:
- Business entity registered (LLC recommended for most sellers)
- EIN obtained from the IRS (free, takes 5 minutes online)
- Business bank account opened (separate from personal finances)
- Sales tax permit obtained for your state (and any states where you have nexus)
- Terms of service, privacy policy, and return policy drafted and published on your site
Don’t skip the legal pages. Beyond compliance, they’re trust signals. Buyers check for return policies before purchasing, and missing legal pages are a red flag that screams “amateur operation.”
2. Domain and Branding
Your domain name should be short, memorable, and match your brand. Avoid hyphens, numbers, and obscure TLDs. Connect your custom domain to your ecommerce storefront and verify it resolves correctly. DNS propagation can take 2-48 hours, so don’t save this for launch day.
Branding essentials to finalize: logo (in multiple sizes for web, social, and favicon), brand colors, typography, and a consistent visual style across your entire store. Your ecommerce web design creates the first impression. Make it count.
3. Product Pages
Product pages are where buying decisions happen. Each product listing needs:
- Professional product photography. Multiple angles, lifestyle shots, and detail images. Professional photography costs $15-50 per SKU and delivers measurable conversion improvements over phone snapshots.
- Unique product descriptions. Never copy supplier descriptions. Write original, benefit-focused copy that addresses what the customer cares about, not just specs. Every best ecommerce store has copy that speaks directly to their target buyer.
- Accurate pricing. Verify your pricing strategy accounts for product cost, shipping, platform fees, payment processing, and a realistic ad spend per sale.
- Correct variants. If you sell multiple sizes, colors, or options, test every variant combination to ensure correct pricing and inventory tracking.
- SEO metadata. Each product page needs a unique title tag and meta description with relevant keywords. This is the foundation of SEO for ecommerce stores.
4. Essential Pages
Beyond product pages, your ecommerce storefront needs these supporting pages ready before launch:
- Homepage with clear value proposition, featured products, and navigation to all categories
- About page telling your brand story (buyers want to know who they’re buying from)
- Contact page with email, contact form, and response time expectations
- FAQ page addressing shipping times, return process, sizing, and common questions
- Shipping policy page with rates, delivery estimates, and international availability
- Return and refund policy page with clear steps and timelines
- Terms of service and privacy policy (legally required in most jurisdictions)
5. Navigation and Site Structure
Customers should find any product within 3 clicks from the homepage. Set up your main navigation menu with logical categories, add a search bar (critical for stores with 20+ products), implement breadcrumb navigation for SEO and usability, and test your menu on both desktop and mobile. Over 60% of ecommerce traffic comes from mobile devices, so your navigation must work on a 5-inch screen.
6. Payment Gateway Configuration
Configure your payment gateway and verify it actually processes payments. Offer at least two payment methods: credit/debit cards plus one digital wallet (Apple Pay, Google Pay, or PayPal). Each additional payment method reduces checkout abandonment. Shopify Payments, Stripe, and PayPal are the most common processors for new stores.
7. Shipping Settings
Incorrect shipping rates are one of the top reasons for cart abandonment and post-purchase complaints. Configure:
- Shipping zones (domestic, international if applicable)
- Rate calculation method (flat rate, weight-based, real-time carrier rates, or free shipping threshold)
- Handling time (how many business days before you ship after an order)
- Carrier integrations for automatic tracking number generation
Test shipping calculations with products of different weights and destinations. A $5 product with a $12 shipping charge will kill your conversion rate.
8. Tax Configuration
Set up automatic tax calculation for every jurisdiction where you have sales tax obligations. Most ecommerce platforms offer built-in tax calculators or integrate with services like TaxJar or Avalara. Get this wrong and you’ll either overcharge customers (losing sales) or undercharge (paying the difference out of pocket at tax time).
9. Email Automation Setup
Configure these automated emails before launch:
- Order confirmation (sent immediately after purchase)
- Shipping confirmation with tracking number
- Delivery confirmation
- Abandoned cart recovery (sent 1-4 hours after cart abandonment)
- Welcome email for new subscribers
Test every email by placing test orders. Verify the content, formatting, links, and that they actually arrive in inboxes (not spam folders). Your email marketing tool should handle these automations out of the box.
10. Analytics and Tracking
Install and verify these before launch, not after. Without tracking from day one, you’re flying blind:
- Google Analytics 4 with enhanced ecommerce tracking enabled
- Conversion tracking events: page views, add to cart, begin checkout, purchase complete
- Facebook/Meta Pixel (if you’ll run Facebook/Instagram ads)
- Google Search Console (for monitoring search visibility)
Phase 2: Launch Day Testing (24-48 Hours Before Go-Live)
Everything from Phase 1 is configured. Now you stress-test the entire customer experience before real buyers arrive.
11. Complete End-to-End Checkout Testing
Place 3-5 test orders using different payment methods (credit card, PayPal, digital wallet). Walk through the entire flow: browse products, add to cart, enter shipping details, apply a discount code, complete payment, and verify the order confirmation email arrives correctly. Then process a refund on one test order to confirm that flow works too.
This single step catches more launch-day problems than everything else combined. If checkout breaks during testing, it would have broken for real customers. Fix it now.
12. Mobile Testing
Open your store on at least two different mobile devices (iPhone and Android). Test navigation, product browsing, image loading, cart functionality, and the entire checkout process on mobile. If anything is hard to tap, slow to load, or visually broken on mobile, fix it before launch. More than half your visitors will arrive on phones.
13. Page Speed Check
Run your homepage and a product page through Google PageSpeed Insights. Aim for a score of 70+ on mobile. A 1-second delay in page load time reduces conversions by 7% according to BigCommerce research. Common speed killers: uncompressed images, too many apps/plugins, and heavy custom code.
14. Broken Link and Image Check
Click every link in your navigation, footer, product pages, and policy pages. Check that all product images load correctly, especially variant images (different colors/sizes). A single broken image on a product page can tank trust and send the buyer elsewhere.
15. Discount Code Testing
If you plan to launch with a promotional discount, test every code. Verify it applies correctly, stacks (or doesn’t stack) with other offers as intended, and appears correctly in the checkout summary and order confirmation email.
16. Remove Password Protection
The most commonly forgotten step. Your store is likely behind a password page during development. Remove the password protection so the public can actually access your store. Then verify by opening your URL in an incognito/private browser window.
Phase 3: Post-Launch Optimization (First 30 Days)
Launching is step one. The first 30 days determine whether your ecommerce storefront gains traction or stalls. Here’s what to focus on.
17. Monitor First Orders Closely
Watch your first 10-20 orders like a hawk. Verify that order notifications work, shipping labels generate correctly, tracking numbers sync, and customers receive their confirmation emails. Any issue that appears in the first batch of orders will repeat at scale if you don’t fix it immediately.
18. Install a Reviews App
Social proof is critical for new stores with zero reputation. Install a reviews app (Loox, Judge.me, or Yotpo) and set up automated review request emails sent 7-14 days after delivery. Your first 10-20 reviews make a disproportionate difference in conversion rate.
19. Set Up Abandoned Cart Recovery
If you didn’t set this up in Phase 1, do it now. Abandoned cart emails recover 5-15% of lost sales on average. Set up a sequence: first email at 1-4 hours, second at 24 hours, third at 72 hours. Include the cart contents, a clear return-to-cart link, and consider a small discount in the third email.
20. Launch Your Content Strategy
Start publishing blog content targeting keywords related to your products. SEO for ecommerce stores is a long game, but the sooner you start, the sooner organic traffic compounds. Product guides, how-to articles, and comparison content attract buyers who are researching before purchasing. Our marketing resources cover content strategy for ecommerce in depth.
21. Run a Small Paid Ad Test
Budget $100-300 for initial ad testing on Facebook/Instagram or Google. The goal isn’t profitability yet. It’s data. You want to learn which products get clicks, which audiences respond, and what your cost per click and conversion rate look like. These numbers inform every marketing decision going forward.
22. Review Analytics Weekly
Check your analytics dashboard weekly during the first month. Track: total sessions, conversion rate, average order value, top traffic sources, most viewed products, cart abandonment rate, and top exit pages. If people are leaving on a specific page, that page has a problem. Find it and fix it.
23-30: Additional Post-Launch Tasks
- Set up Google Shopping feed to list products in Google Shopping results (free and paid)
- Claim social media profiles and link to your store from bio/about sections
- Set up backup and security. Enable SSL (should be automatic), configure automated backups, and install fraud protection
- Create a sitemap and submit to Google Search Console for faster indexing
- Optimize product titles based on initial search data from Google Search Console
- Set up customer support channels with clear response time expectations (live chat, email, or helpdesk)
- Plan your first email campaign to subscribers announcing your launch and initial product lineup
- Collect and implement customer feedback from your first buyers to improve the experience
Ecommerce Storefront vs. Amazon Ecommerce Store
Many sellers debate between building their own ecommerce storefront and selling through an Amazon ecommerce store. Here’s the honest comparison:
| Factor | Your Own Storefront | Amazon Store |
|---|---|---|
| Traffic | You drive 100% of traffic (ads, SEO, social) | Built-in: 300M+ active buyers |
| Fees | 2.9% + $0.30/transaction + platform fee | 15% referral fee + FBA fees |
| Brand control | Full control: design, experience, messaging | Limited: Amazon’s template, Amazon’s rules |
| Customer data | You own all customer data | Amazon owns the customer relationship |
| Competition | Only what you attract to your site | Competing on the same page as similar products |
| Trust factor | Must be earned through branding and reviews | Amazon’s trust transfers to your listing |
| Best for | Brand builders, long-term equity | Fast sales, product validation |
The smart play: use Amazon to validate demand and generate initial sales, then build your own storefront to capture higher margins and own the customer relationship. Many best ecommerce stores started on marketplaces and graduated to their own platforms once they proved product-market fit.
What Is an Ecommerce Storefront: Platform Options
What is an ecommerce storefront? It’s your online store, the website where customers shop. The platform you build it on determines your capabilities, costs, and scalability. Here’s the quick breakdown:
Shopify ($39-399/month) is the most popular for new sellers. Fastest setup, largest app ecosystem, least technical knowledge required. Best for sellers who want to launch quickly without coding.
WooCommerce (free plugin, hosting $10-50/month) runs on WordPress. More customizable than Shopify but requires more technical setup. Best for sellers who already know WordPress or want maximum flexibility.
BigCommerce ($39-399/month) offers strong built-in features without relying on apps. Best for sellers who want fewer third-party dependencies.
Our ecommerce platform comparison covers all options with pricing, feature comparisons, and recommendations by business model. Choose your platform before starting the checklist above, as some configuration steps are platform-specific.
Frequently Asked Questions
What is an ecommerce storefront and what does it need to launch?
An ecommerce storefront is a website where customers browse, select, and purchase products online. To launch, it needs product listings with photos and descriptions, a configured payment gateway, shipping settings, tax calculation, legal pages (privacy policy, terms, return policy), and analytics tracking. This checklist covers all 30 essential steps.
How long does ecommerce storefront development take before launch?
A basic ecommerce storefront on Shopify or WooCommerce can be set up in 1-2 weeks if products and branding are ready. More complex stores with custom design, large catalogs, or integrations take 4-8 weeks. Domain DNS propagation takes 2-48 hours, so connect your domain early in the process.
What makes the best ecommerce stores different from average ones?
The best ecommerce stores nail three things: fast page load speeds (under 3 seconds), professional product photography with unique descriptions, and a frictionless checkout process with multiple payment options. They also invest in SEO for ecommerce stores and email automation from day one rather than treating them as afterthoughts.
Should I build my own ecommerce storefront or sell on Amazon?
Start on Amazon to validate demand with built-in traffic, then build your own storefront for higher margins and customer data ownership. Amazon charges 15% referral fees versus 2.9% payment processing on your own site. Your own storefront builds long-term brand equity that marketplace selling doesn’t.
What is SEO for ecommerce stores and when should I start?
SEO for ecommerce stores means optimizing product pages, category pages, and blog content to rank in Google search results. Start before launch by writing unique product titles and descriptions with relevant keywords, setting up proper URL structures, and submitting your sitemap to Google Search Console. SEO compounds over time, so earlier is always better.
How much does starting an ecommerce store cost?
A basic storefront costs $500-2,000 to launch including platform subscription, domain, theme, initial product photography, and marketing launch budget. Print on demand and dropshipping stores can launch for under $200. Private label stores with custom inventory typically need $2,000-10,000. Our startup costs guide breaks down every expense by business model.
Related Reads
- How to Start an Ecommerce Business
- Best Ecommerce Platform Comparison
- Ecommerce Web Design Guide
- Ecommerce Website Templates
- Payment Gateway Setup
- Ecommerce Startup Costs Breakdown
Enjoying this? Get more like it every week.
One email per week with ecommerce strategies, tool picks, and seller insights. No spam.